






We may not have the course you’re looking for. If you enquire or give us a call on 01344203999 and speak to our training experts, we may still be able to help with your training requirements.
How to Change Background on Microsoft Teams: The Complete Guide
ByVishnu SankarLast updated on: 02 October 2026
Learn how to change the background on Microsoft Teams with this comprehensive blog and add professionalism to your virtual meetings. Discover tips for customising your virtual space, whether for desktop or mobile use. Enhance your meetings and make a lasting impression.
What You'll Learn
1. How to change your Microsoft Teams background before or during a meeting.2. How to blur, remove or upload a custom background on desktop and mobile.3. How to choose backgrounds that look professional and minimise distractions.4. How background options can vary depending on your device, Teams version, and meeting setup.
Are you wondering how to change the background on Microsoft Teams to enhance your virtual meetings? In the era of remote work, making a strong visual impression can be as crucial as the content of your discussions. Mastering Microsoft Teams' background settings can elevate your presence, whether for professionalism or hiding your space.
In this blog, we'll explore the various methods, whether you're using a desktop or mobile device. We'll start with system requirements for desktop users on how to change background on Microsoft Teams, followed by a tutorial for mobile users. Read ahead to learn how to customise your virtual meeting space effectively.
How to Change Background on Microsoft Teams on Desktop?
If you're using Microsoft (MS) Teams on your desktop, here's how you can effectively change your background.
1) System Requirements
Before you begin, make sure you are using a supported and up-to-date version of Microsoft Teams. Background effects depend on your device, operating system and meeting environment, and some features may not be available when Teams is used through certain virtual desktop environments.

2) Launch Microsoft Teams
Open the Microsoft Teams application on your desktop. If you haven't yet installed it, you can also download the application from the official Microsoft website.
3) Initiate or Join a Meeting
You can change your background before joining a Teams meeting or while a meeting is in progress. Here are the steps to follow:
a) Join or start a Teams meeting using your Calendar, a meeting invitation, a shared link, or another available meeting option.
b) If you're just experimenting with the background feature, starting an instant meeting with only yourself can be a good idea.
4) Accessing the Background Feature
Once your video feed is active, you can open the video effects or background settings. Depending on your Teams version, you may find this under More actions, Video effects and settings, or the dropdown next to the Camera control.
5) Browsing Available Backgrounds
Teams display a range of available video effects and backgrounds. You can choose a Microsoft-provided background, blur your surroundings or add a custom image, depending on the options available on your device.
Also, depending on your Teams version and licence, additional video effects or AI-assisted background options may also be available.
6) Review and Apply
Before making the background live for other participants to see:
a) Click on a background to highlight it.
b) If the Preview option is available, select it to check how the background looks before applying it.
c) If satisfied with the appearance, click on the 'Apply' button located next to the 'Preview' button.
7) Uploading Custom Backgrounds
Microsoft Teams also allows for a touch of personalisation by letting you upload your backgrounds:
a) At the top of the right-hand panel, you'll see an 'Add new' option.
b) Click on it to navigate to your computer's file explorer.
c) Choose a clear, high-resolution image with an aspect ratio that suits a widescreen video frame. A 16:9 image such as 1920 × 1080 generally works well.
d) Once uploaded, the image will appear in your list of available backgrounds. From there, you can select, preview, and apply it just like the default options.
e) Use a supported image format such as JPG, PNG or BMP.
8) Opting for a Simple Blur
If you don't want to use a specific image but need to obscure your surroundings:
a) The first option in the background panel is a simple blur feature.
b) Select it and hit 'Apply' to blur out your immediate environment, ensuring you remain in focus.
9) Reverting to Your Natural Background
To go back to your original background:
a) Click on the 'None' option located at the top of the background panel.
b) Then, simply click 'Apply'.
Master Microsoft Teams management by signing up now for our Managing Microsoft Teams MS700 Training - Register now!
How to Change Background on Microsoft Teams on Mobile?
Now, let's check how you can navigate and utilise the background-changing feature in Microsoft Teams on mobile devices:
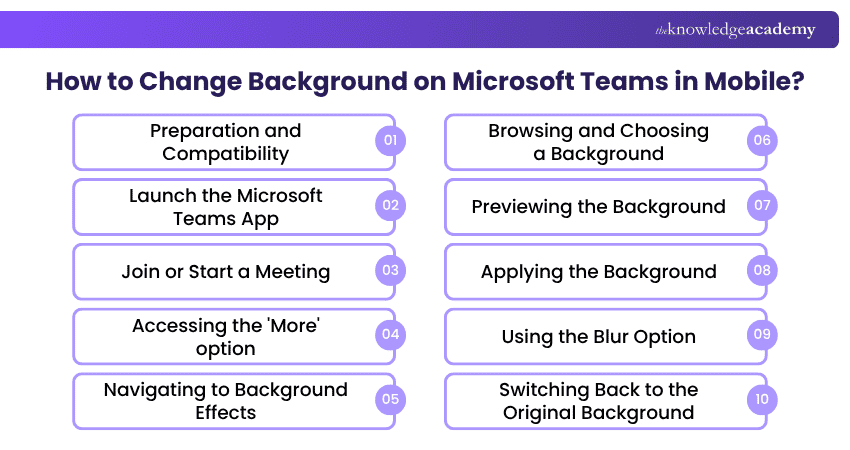
1) Preparation and Compatibility
Before you begin, ensure that your mobile device is compatible with the background change feature of Microsoft Teams. Microsoft keeps updating its app to provide the best features to a wider range of devices. Always make sure your Microsoft Teams app is the latest version.
2) Launch the Microsoft Teams App
Tap on the Microsoft Teams app on your mobile device. If you haven't installed it yet, you can download it for free from your respective app store.
3) Join or Start a Meeting
a) On the main dashboard, tap on the 'Calendar' option.
b) Here, you can either join a pre-scheduled meeting or start a new one instantly.
c) After choosing your desired option, you will enter the video meeting interface.
4) Accessing the 'More' option
Once your video feed is active:
a) Look for the three-dot icon, usually found at the bottom-right corner of your screen. This is the 'More' option.
b) Tap on 'More' to reveal a dropdown menu with various features.
5) Navigating to Background Effects
From the dropdown menu, select the 'Background effects' option. This will guide you to a new screen where you'll see a list of available Microsoft Teams backgrounds.
6) Browsing and Choosing a Background
Microsoft Teams on mobile provides a set of default backgrounds. They range from professional-looking office settings to more casual and abstract designs:
a) Swipe through the options to view available backgrounds.
b) Once you find one you like, tap on it to select it.
7) Previewing the Background
Before making any background live, it's always a good idea to preview it:
a) After selecting a background, you will see the 'Preview' button.
b) Tap on it to get a quick look at how the background appears with your current lighting and position.
8) Applying the Background
If you're satisfied with the preview, hit the 'Apply' button, and your chosen background will immediately take effect.
9) Using the Blur Option
For users who don't want a specific image but prefer a nondescript background:
a) The first option in the background list is a simple blur.
b) By selecting and applying it, everything behind you will be blurred out, leaving only you in clear focus.
Protect Sensitive Information
Do not treat blur as a privacy guarantee. Microsoft warns that blurring or replacing a background may not fully prevent sensitive information from being visible.
10) Switching Back to the Original Background
If you decide to revert to your natural background:
a) Navigate back to the background effects via the 'More' option.
b) Select the 'None' option at the beginning of the list, then apply.
Develop the skills needed to navigate Microsoft 365 environments with Microsoft 365 Fundamentals (MS-900) Training – Sign up soon!
Tips to Customise MS Teams Background for a Personal Touch
While there's an array of default backgrounds available for your videos in MS Teams, adding a personal touch to your background can help you stand out, reflect your personality, or even set the mood for specific meetings. Here are some tips to customise your Microsoft Teams Background:
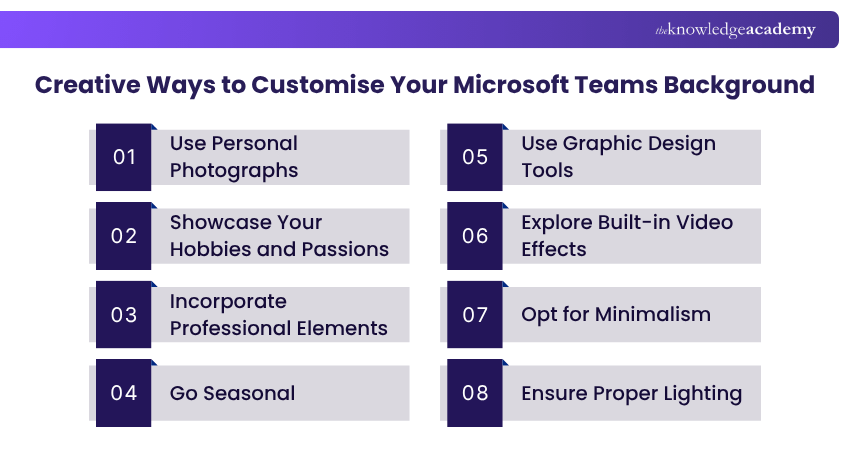
1) Use Personal Photographs
Use images from memorable vacations or trips. This not only adds a personal touch but can also serve as a conversation starter. This also helps to break the ice in meetings. If you’re in a more informal setting, backgrounds featuring family gatherings, pets, or personal milestones can make your background feel cosy and relatable.
2) Showcase Your Hobbies and Passions
If you’re an avid reader, a backdrop of a home library or your favourite reading nook can be a great choice. For artists, a background featuring your art studio, crafts, or even a piece of artwork you're particularly proud of can be both personal and inspiring. For sports enthusiasts, an image of you in action or a snapshot of your favourite sports stadium can be energising.
3) Incorporate Professional Elements
If you’re representing a company or personal brand, consider incorporating your logo or brand colours subtly into the background. Displaying accolades, trophies, or certificates can serve as a silent testament to your dedication and hard work.
4) Go Seasonal
Change your background according to the season or upcoming holidays, be it a snowy landscape for Christmas, colourful lights for Diwali, or an autumnal theme for Thanksgiving. You can also put backgrounds of “Think World Book Day”, “Earth Day”, or any other special day that resonates with you. This can show attendees that you’re engaged with global events and observances.
5) Use Graphic Design Tools
Platforms like Canva or Adobe Express allow you to design customised backgrounds from scratch or using templates. You can add layers, text, and elements to craft a backdrop that’s uniquely yours.
6) Explore Built-in Video Effects
Depending on your Teams version and account, additional effects may be available alongside standard backgrounds and blur. Use built-in options where possible because they integrate directly with Teams and are easier to preview and manage.
7) Opt for Minimalism
Sometimes, less is more. A minimalist background with soft colours, simple patterns, or basic geometric shapes can look sophisticated and reduce visual clutter during a meeting.
8) Ensure Proper Lighting
Regardless of your chosen background, ensure you’re well-lit. This enhances the look of the background and ensures you stand out clearly against it. Use soft, even lighting from in front of you rather than relying on strong light from behind. Good lighting helps Teams separate you more cleanly from the virtual background.
9) Regularly Update and Rotate
Regularly refreshing your background can help keep your virtual meeting space looking neat, relevant, and appropriate for different types of meetings.
10) Maintain Sensitivity
While personalising, be conscious of the backgrounds you choose, ensuring they are universally respectful and considerate of diverse audiences.
Trainer's Tip
Choose your background based on the meeting, not just appearance. A neutral or lightly blurred background works well for interviews and client calls, while branded or customised backgrounds can suit presentations and internal events. Always preview the effect first to check that your face, clothing, and gestures remain clearly visible.
Master key Microsoft Office applications and streamline everyday tasks with Microsoft Office Training – Join now!

Vishnu Sankar is a Senior Content Writer with 5+ years of experience across content development, software development, web development and system administration. His technical background and professional training support his expertise in IT and Tech, while his extensive research and writing experience covers Project Management and Health and Safety.
View Detail

 If you wish to make any changes to your course, please


