




We may not have the course you’re looking for. If you enquire or give us a call on +44 1344 203 999 and speak to our training experts, we may still be able to help with your training requirements.
How To Update Kali Linux? A Complete Breakdown
ByNilotpal SarmahLast updated on: 22 September 2026
Read this blog to learn How to Update Kali Linux. It will also help you to understand the process with its brief yet comprehensive step-by-step procedure. This blog will also use command-line tools like ‘apt-get update’ and ‘apt-get upgrade’ to refresh repositories and upgrade packages, ensuring the system has the latest security patches and features.

If you want to know How to Update Kali Linux, you have come to the right place. Updating Kali Linux, a renowned distribution for Cybersecurity professionals, is crucial to ensure the system's security and efficiency. This blog will help you through the process of updating Kali Linux, a necessary practice for accessing the latest tools, features, and security patches.
The process primarily involves command-line operations using the Advanced Packaging Tool (APT). Regular updates not only enhance functionality but also fortify the system against vulnerabilities. For beginners and experienced users, understanding How to update Kali Linux is essential for maintaining a robust and reliable environment for penetration testing and security research.
Decoding How to Update Kali Linux
Updating Kali Linux is critical for maintaining system security and accessing the latest Kali Linux Tools and features, a topic often discussed in Kali Linux Interview Questions and Answers. Regular updates help patch vulnerabilities, improve system stability, and enhance the overall user experience. Below is a step-by-step guide on how to update Kali Linux effectively:
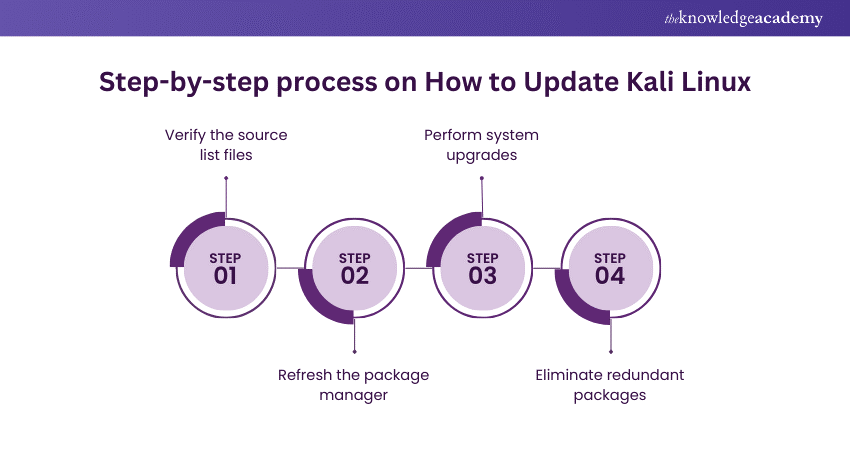
Step 1: Verify the source list files
Before initiating an update, verifying that your system's repository list is correctly configured is crucial. Kali Linux’s package management relies on these repository lists to locate and install new updates and packages.
a) Accessing the source list: Open a terminal and use a text editor to access the source list file located at /etc/apt/sources.list. You can use editors like nano or vim, e.g., sudo nano /etc/apt/sources.list.
b) Checking the contents: The file should contain official Kali Linux repository links. The primary repository link usually looks like deb https://http.kali.org/kali kali-rolling main non-free contrib. Ensure there are no unofficial or deprecated repositories, as they might compromise the system's security and stability.
c) Updating the source list: If necessary, modify the list to include only the official and current Kali Linux repositories. Save and close the editor.
Master Kali Linux with ease! Download the Kali Linux Commands Cheat Sheet PDF for quick access to essential commands and shortcuts.
Step 2: Refresh the package manager
The next step is to refresh the package manager, ensuring it has the latest information from the repositories.
a) Refreshing package information: In the terminal, run sudo apt-get update. This command updates the local package index with the latest information from the repositories set in the source list. It’s important to note that this command doesn't install or upgrade any packages; it merely fetches the latest package lists.
b) Checking for errors: Pay attention to the output. If you see any errors, they may indicate issues with your internet connection or the repository sources. Rectify any issues before proceeding.
Step 3: Perform system upgrades
After refreshing the package manager, the system is ready for upgrades.
a) Upgrading packages: Run sudo apt-get upgrade. This command upgrades all the installed packages to their updated versions in the repositories. Unlike a full system upgrade, it doesn’t remove any packages or install new ones that have not already been installed.
b) Performing a dist-upgrade: For a more comprehensive upgrade, use sudo apt-get dist-upgrade. This command handles changes in package dependencies with new versions of packages and installs necessary new packages while removing any outdated packages. It's more thorough than a simple upgrade and is recommended to ensure the system is fully current.
c) Review changes: Before confirming the upgrade, review the list of changes apt-get will make. This includes packages to be upgraded, newly installed, and removed. Confirm the changes to proceed with the upgrade.

Step 4: Eliminate redundant packages
Over time, your system might accumulate packages that are no longer needed. Cleaning these up can free up space and reduce clutter:
a) Removing unnecessary packages: Run sudo apt-get autoremove. This command removes packages that were automatically installed to satisfy other packages' dependencies and are no longer required.
b) Cleaning up: To remove downloaded package files no longer required, use sudo apt-get clean. This step frees up disk space by deleting cached files.
c) Checking system health: It’s good practice to check the system’s overall health and functionality after the cleanup. Ensure that your essential tools and applications are running correctly.
Learn more about Automation and Penetration with our Automation & Penetration Testing Training!

Nilotpal Sarmah is a Senior Content Writer with 11+ years of overall experience spanning engineering, operations and content development. His technical knowledge and extensive writing experience enable him to simplify specialised topics across IT and Tech, Business Skills, Project Management, Health and Safety, and ISO and Compliance.
View Detail

 If you wish to make any changes to your course, please


