We may not have the course you’re looking for. If you enquire or give us a call on 01344203999 and speak to our training experts, we may still be able to help with your training requirements.
Training Outcomes Within Your Budget!
We ensure quality, budget-alignment, and timely delivery by our expert instructors.

Time and date are the two most common types of data used in Excel. However, most Excel users need help to work with dates. According to Acuity Training, out of all spreadsheets, 12% of them contain serious errors, which include significant errors with dates.
When you insert a date in MS Excel, it changes its format automatically per Excel’s default date settings. For example, when you insert the date January 6, 2021, Excel will display the date as 6-Jan/6 January/January 6, 2021/01/06/2022, as per default settings.
The representation of date and time in Excel can be difficult for beginners to understand. Understanding the different types of Excel date formats can help you use Excel more effectively.
Besides, you’ll find that when the cell’s format is set to “standard”, the date you’ve entered will be displayed as integers. If you’re interested to learn - how to change date format in Excel, you’re at the right place. All you’ll have to do is go through the steps mentioned in this blog.
Table of Contents
1) What is Excel Date Format
2) How to Change Date Format in Excel?
3) How to create a Custom Excel Format?
4) How to Change a Data Format to any other Locale
5) Simple Steps to Organise Dates in Excel
6) Reasons you’re unable to change your Data Format in Excel
7) Conclusion
What is Excel Date Format
People who use Excel regularly should know how to change date format in Excel. It helps them to save time at work. However, it's important to note that Excel stores default time and date, which leads to confusion.
Although Excel users assume Excel remembers the month, year, and day of a particular date, it’s not true. The dates in Excel are stored as a sequence of numbers. Next, the display of a number as a date and time or a date, time occurs due to a cell’s formatting.
Dates in Excel
Dates in Excel are stored in the form of integers. These integers represent the total number of days. The days are counted from January 1, 1900, to December 31, 9999. So, the days are stored in Excel as 2958465. Under the system, the days are mentioned as follows:
a) 2-Jan-1900 is 2
b) 3-Jan-1900 is 3
c) 1-Jan-2015 is 42005 (it is counted as 42005 because it counted after 1 January 1900)
Sign up and learn the top 10 Excel shortcuts with our Microsoft Excel Masterclass!
Time in Excel
It is important to understand the way time is represented in MS Excel, as it can get a bit confusing. In Excel, it is presented as decimals between .0 and .99999. This represents a portion of a day in which .0 means 00:00:00 and .99999 means it is 23:59:59. For instance,
a) 06:00 AM is 0.25
b) 12:00 PM is 0.5
c) 12:59:59 PM is 0.541655093
Dates & Times in Excel
Excel represents dates and time in different formats. Both are stored as decimal numbers, which consists of the date in the form of an integer and the time via decimal portion.For instance:
a) 1.25 is January 1, 1900 6:00 AM
b) 42005.5 is January 1, 2015 12:00 PM
Build your career as a Data Analyst - sign up for Data Analysis Training using MS Excel!
How to Change Date Format in Excel?
If you want to change the date format in Excel, you can start by selecting the format you want from the list. The type of format you want to enter is included in the Excel menu.
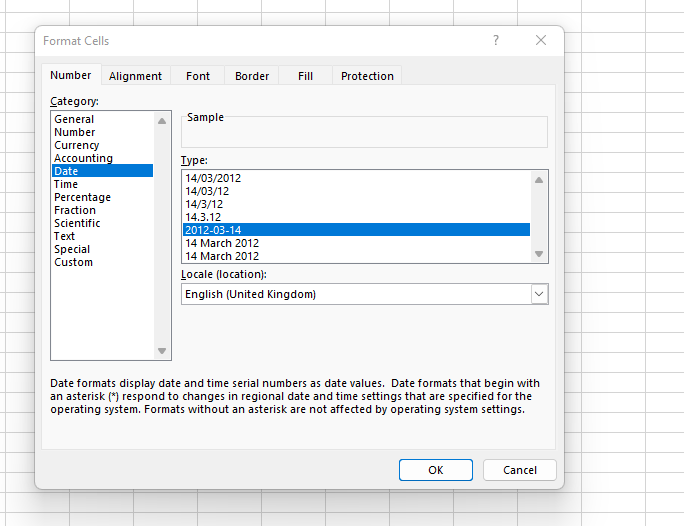
Let us learn how to change date format in Excel to YYYY/MM/DD in our example below.
1) Choose the cells that require formatting
2) Press Command+1 or Ctrl+1
3) Click on the “Numbers” option
4) Select “date” from the menu
Click on the “Type” tab; next, choose YYYY/MM/DD or any other format you want
How to create a Custom Excel Format?
The list allows you to select the format you want. So, you can create a custom format once you’ve chosen the format closest to your requirement. You can change the format as per your requirement by following a few simple steps:
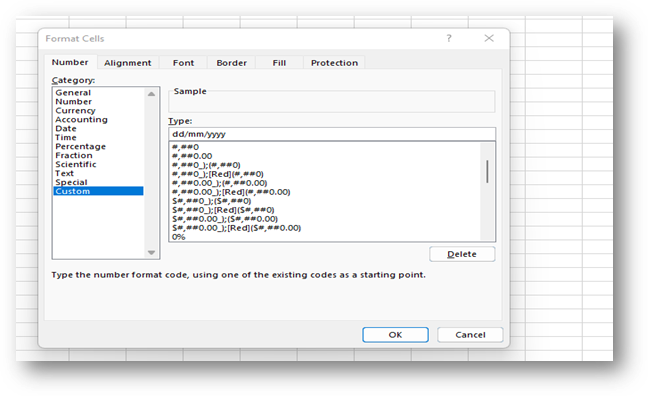
1) Select the “Category” option, and choose “custom.”
2) The format you selected earlier is displayed. Now, you can make changes. These changes will apply to the customised setting only. It will not be included in the default setting.
3) If you want to enter DD/MM/YYYY in the date display, you’ll have to click on Format Cells. Next, choose the “Custom” option.
4) Next, fill in DD//MM/YYYY in the given space.
How to Change a Date Format to any other Locale
People who use dates for multiple locations have the option to switch to a new locale. This can be done by following the below-mentioned steps:
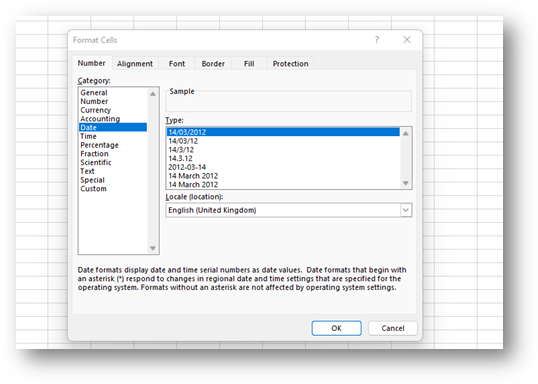
1) Choose a particular cell or a group of cells
2) Press Command+1 or Ctrl+1
3) Click on the “Numbers” tab. Click on “Date”
4) Hit on the “Type” option. You’ll find a drop-down menu that displays “Locale”
5) Choose the appropriate “Locale”
If you want to customise these settings for every time you work on excel, follow the given steps:
1) Follow the above steps that were used to customise a date
2) Come up with an appropriate format
3) Include the locale code in the customised format
4) Select the proper locale codes. The format of locale codes is ($-####).
Get expertise in visualisation, register in Retired: Analysing and Visualizing Data with Microsoft Excel!
Simple Steps to Organise Dates in Excel
Organising data becomes easy when you’re using the correct format in Excel. Additionally, you can follow a few tips to organise a date in an easy-to-read format.
1) Cell size: The space available in the cell should be wide enough. When there’s no space in the cell, the format will appear as an error (####). You can double-click on the column’s right border to increase its size. It helps to display any date entered correctly.

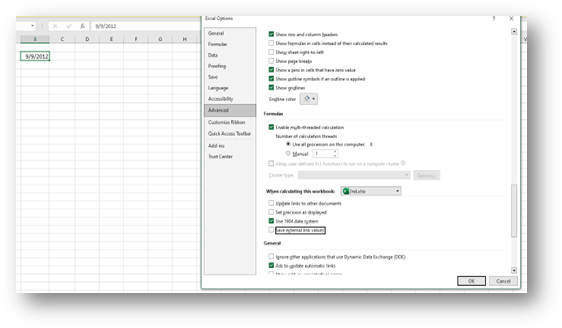
2) Date system: You should change the date system when negative numbers are displayed as dates. Excel often changes negative numbers into dates when you use hyphens. You can fix this issue by selecting cells and clicking on the options menu. Next, you’ll have to click on “Advanced.” Now, you can click on the “Use 1904 date system” option.
3) Use of formulas: If you want the current date to appear on the cell at all times, you can use a specific formula. For example, you can use =TODAY(). Now, you can press ENTER.
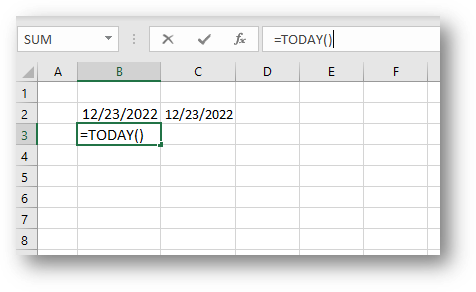
4) Change the imported text into format: Excel often registers dates sourced from external databases as text. The text displayed looks similar to the format, but it is different. The DATEVALUE function helps convert this text into dates.
Reasons you're unable to change your Date Format in Excel
You can experience several issues when changing the date format. Some of the primary reasons are as follows:
1) Sometimes we add dates to Excel as numbers, but sometimes we forget to follow the date format. However, in this case, Excel assumes it to be a text rather than a date.
2) The dates in the cell may be left aligned.
3) The date entered includes an apostrophe.
4) The cell’s size is larger than the standard size.
5) Excel formats negative figures as dates.
Even if the dates are not formatted correctly, you won’t be able to derive the accurate result in your spreadsheet.
Conclusion
Many Excel users may find it challenging to change the date format, and Excel may consider dates to be text values. Additionally, others find it difficult to import data from an external database or a .csv file to an Excel spreadsheet. As in this case, Excel considers imported dates as text. We hope you have learnt how to change date format in excel using formulas after reading this blog. Note the essential points you must consider when formatting the date. This help eases your task.
Learn how to create advanced formulas in MS Excel - Sign up for Microsoft Excel Expert!
Frequently Asked Questions
Upcoming Office Applications Resources Batches & Dates
Date
 Microsoft Excel Course
Mon 13th May 2024
Mon 3rd Jun 2024
Mon 17th Jun 2024
Mon 1st Jul 2024
Mon 15th Jul 2024
Mon 5th Aug 2024
Mon 19th Aug 2024
Mon 2nd Sep 2024
Mon 16th Sep 2024
Mon 7th Oct 2024
Mon 21st Oct 2024
Mon 4th Nov 2024
Mon 18th Nov 2024
Mon 2nd Dec 2024
Mon 9th Dec 2024
Mon 16th Dec 2024


 Top Rated Course


 If you wish to make any changes to your course, please


