


We may not have the course you’re looking for. If you enquire or give us a call on 01344203999 and speak to our training experts, we may still be able to help with your training requirements.
Top 15 Xero Tips and Tricks for Everyday Accounting
ByThe Knowledge AcademyLast updated on: 12 November 2026
Discover practical Xero tips and tricks to simplify accounting tasks, streamline bookkeeping, manage invoices, track expenses and improve financial efficiency.

Quick Snapshot
1. Xero offers time-saving features for invoicing, bank reconciliation, expense tracking and financial record management.2. Repeating bills, recurring invoices and automatic reminders help reduce repetitive accounting tasks.3. Bank rules and cash coding simplify reconciliation, while direct bank feeds automate transaction imports.4. Managing user permissions, setting lock dates and reviewing automated entries help maintain accurate financial records.
Business Owner: Why does bookkeeping still take so much time when we're using accounting software?
Accountant: Are you using bank rules, repeating invoices and automated reminders?
Business Owner: I didn't know Xero could help with all that.
It is a familiar situation. Having accounting software is one thing, but knowing how to use its features effectively is another.
Xero offers several ways to simplify financial tasks, yet some useful capabilities can be easily overlooked. In this blog, we'll explore 15 Xero tips and tricks to make accounting tasks easier, faster and more organised.
Top 15 Xero Tips and Tricks
Xero is a cloud-based accounting platform that helps businesses manage invoicing, expenses, bank transactions and financial records in one place. While its core features support various financial activities, knowing how to use them effectively can make a difference.
Here are the practical Xero tips and tricks to help you make better use of the platform and its capabilities:
1) Manage User Roles and Permissions
One of Xero's useful features is the ability to control what different users can access within your organisation. You can assign predefined roles and additional available permissions based on each person's responsibilities.
For example, a Bookkeeper may need access to everyday accounting tasks, while another employee may only require permission to create invoices or bills.
To manage user access:
a) Open your organisation's settings in Xero.
b) Select ‘Users’ to view existing users or invite someone new.
c) Choose an appropriate user role and any available additional permissions.
d) Review the access being granted before saving the changes or sending an invitation.
Xero provides different levels of access rather than allowing unrestricted creation of fully customised roles.

2) Automate Repeating Bills
If your business receives regular bills for expenses such as rent, utilities or subscriptions, creating repeating bills in Xero can save time. Instead of entering the same supplier bill every month, you can set up a repeating bill template that generates bills according to your chosen schedule.
To create a repeating bill, open the bills area in Xero and select the option to create a repeating bill. Enter the supplier details, amount, frequency and relevant accounting information. Depending on the available settings, repeating bills can be generated as drafts or approved transactions. Automatic approval may be restricted by tracked inventory items, lock dates or subscription limits.
3) Use Keyboard Shortcuts
Xero provides keyboard shortcuts that help users navigate between sections, access accounting records and perform common actions without relying entirely on mouse clicks. Learning these shortcuts can save time when working with invoices, bills and other financial information.
Here are some useful Xero keyboard shortcuts:
a) Open Search (/): Press the forward slash key to access Xero's search function.
b) Access Invoices (/ + I): Open the search function, enter 'I’ and press Enter to reach the invoices page.
c) Access Bills (/ + B): Open search, enter “b” and press Enter to reach the bills section.
d) Access Contacts (/ + C): Find the contacts section without navigating through menus.
e) Save and Close an Invoice (Alt + Shift + C): Save and close a draft invoice in new invoicing on Windows (Opt + Shift + C on Mac).
These shortcuts can reduce repetitive navigation and make frequently used accounting functions easier to access.
4) Set up Automatic Invoice Reminders
Following up on unpaid invoices can take considerable time, especially when managing multiple customers. Xero's automatic invoice reminders help simplify this process by sending scheduled emails when payments are approaching their due dates or are overdue.
You can customise reminder messages and choose when customers should receive them. To set up invoice reminders:
a) Open the ‘Invoices’ area in Xero.
b) Access the invoice reminder settings.
c) Enable automatic invoice reminders.
d) Choose the reminder schedule and customise the email messages.
e) Save your settings to activate the reminders.
You can also manage reminders for individual customers or invoices when necessary. This feature reduces manual follow-ups and helps businesses maintain a more organised accounts receivable process.
5) Connect Xero with Google Sheets
Google Sheets is useful for organising, analysing and sharing financial information. If you regularly work with spreadsheets, connecting Xero with Google Sheets can make financial reporting more convenient. Xero supports exporting reports to Google Sheets and offers third-party integrations for additional capabilities. Here are some popular Xero integrations:
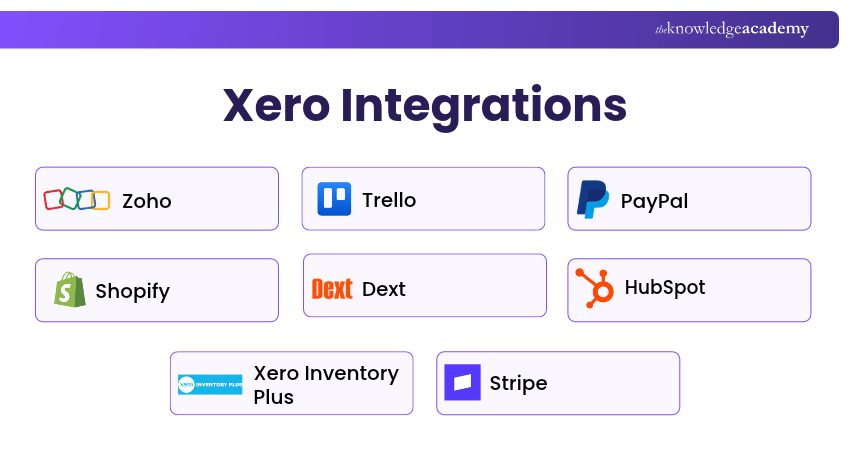
You can export supported Xero reports directly to Google Sheets or use compatible third-party integrations to transfer additional accounting data. Depending on the export method or integration, you may be able to:
a) Import accounting data into spreadsheets.
b) Create customised financial reports and dashboards.
c) Analyse transactions using formulas, charts and pivot tables.
d) Schedule data updates where supported.
e) Share financial information with authorised team members.
To automate data transfers, install a compatible third-party integration and authorise access to your Xero organisation and Google account. Alternatively, export supported reports directly from Xero to Google Sheets. This can help reduce manual exports and make it easier to analyse financial data. However, available features, permissions and subscription costs depend on the integration you choose.
Build dynamic reports and dashboards that support smarter business decisions with Google Sheets Course – Register today!
6) Create Bank Rules for Recurring Transactions
If your business frequently processes similar bank transactions, Xero's bank rules can help simplify reconciliation. Bank rules allow you to define conditions based on transaction information, such as descriptions or amounts.
When a bank statement line meets those conditions, Xero can suggest the appropriate transaction details. For example, you could create a rule for recurring parking fees or regular bank charges.
To create a bank rule:
a) Open the relevant bank account's reconciliation screen.
b) Find a suitable statement line and select the option to create a bank rule.
c) Enter the conditions the transaction must meet.
d) Specify the relevant account and other accounting details.
e) Save the rule and review the suggested transactions during reconciliation.
7) Reconcile Transactions with Cash Coding
Cash coding is a Xero feature that helps users reconcile multiple straightforward bank transactions more efficiently. It is particularly useful when processing large numbers of similar transactions, such as bank fees, interest income or routine expenses.
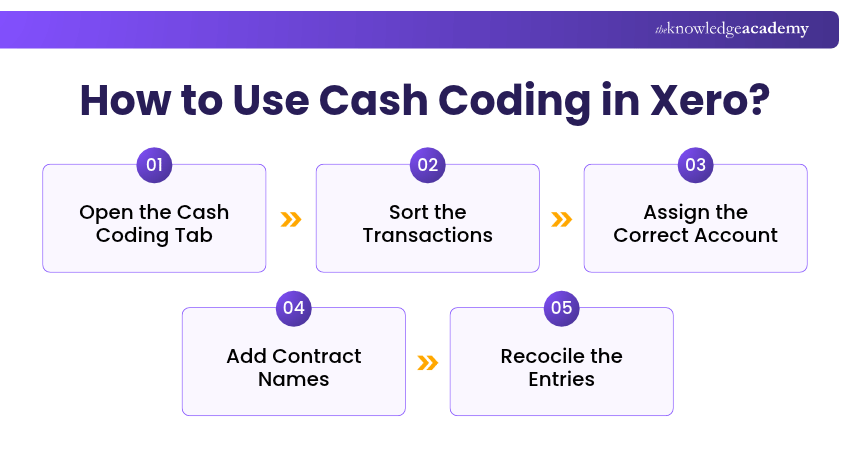
Instead of coding each transaction individually, you can work through several bank statement lines using a tabular interface. To use cash coding:
a) Open the relevant bank account in Xero.
b) Access the ‘Cash Coding’ tab, if available to your user role.
c) Review the bank statement lines.
d) Assign the appropriate accounts, tax rates and other relevant details.
e) Check the information before reconciling the transactions.
Cash coding is intended for creating spend money or receive money transactions from bank statement lines. It should not be used when the correct transaction already exists in Xero and needs to be matched.
Pro Tip
Before using cash coding, check whether the transaction has already been entered in Xero. Creating a new transaction when an existing invoice, bill or payment should be matched can result in duplicate accounting records.
8) Manage Documents with Hubdoc
Hubdoc is a document capture and management application that integrates with Xero. It helps businesses collect, organise and process financial documents such as receipts, invoices and supplier bills.
Instead of manually entering information from every document, you can use Hubdoc to extract key details from uploaded documents and publish them as transactions in Xero. You can submit documents through supported methods, including:
a) Uploading files from your computer.
b) Capturing receipts using a mobile device.
c) Forwarding documents through email.
d) Using supported automated document collection options.
Once Hubdoc is connected to your Xero organisation, you can configure how documents are processed and published.
9) Automate Recurring Sales Invoices
If you regularly invoice customers for the same products or services, Xero's repeating invoices can simplify the process. For example, businesses providing monthly subscriptions, maintenance services or ongoing professional support may need to issue similar invoices at regular intervals.
Rather than creating each invoice manually, you can set up a repeating invoice template.
To create a repeating invoice:
a) Open the ‘Invoices’ area in Xero.
b) Access the repeating invoices section.
c) Create a new repeating invoice template.
d) Enter the customer details, invoice items and payment terms.
e) Choose the frequency and relevant invoice settings.
f) Save the template to generate invoices according to the schedule.
Depending on the configured options, repeating invoices can be created as drafts, approved for manual sending or automatically approved and emailed using the 'Approve for Sending' option. For the first invoice to be sent automatically, the repeating template must start on a future date.
10) Connect Direct Bank Feeds
Direct bank feeds allow supported bank accounts to send transaction information into Xero automatically. Instead of manually downloading and importing bank statements, you can connect an eligible bank account and receive regular transaction updates.
This makes it easier to monitor financial activity and keep bank reconciliation up to date. To set up a bank feed:
a) Open the ‘Bank Accounts’ area in Xero.
b) Pick the option to add or connect a bank account.
c) Search for your bank and check the available connection options.
d) Follow the bank-specific authorisation or setup instructions.
e) Confirm the connection and review imported transactions.
Some banks support direct connections through online authorisation, while others may require additional setup steps. Once connected, review and reconcile transactions regularly to maintain accurate financial records.
11) Find and Recode Transactions Efficiently
The 'Find and Recode' feature helps users with the advisor role locate and update supported accounting details across multiple transaction lines. For example, you might discover that several expenses have been assigned to the wrong account or tax rate. Instead of opening every transaction separately, you can use Find and Recode to make supported changes in bulk.
The feature can help with:
a) Finding transactions that meet specific search conditions.
b) Updating supported account codes.
c) Correcting applicable tax rates.
d) Updating supported tracking categories.
e) Reviewing transaction coding across a selected group of entries.
12) Seek Help from Xero-certified Advisors
Although Xero includes several tools for simplifying accounting, some tasks may require professional guidance. Xero-certified advisors are accounting and bookkeeping professionals who have completed relevant Xero certification requirements.
They can help businesses with activities such as:
a) Setting up and managing a Xero organisation.
b) Reviewing bookkeeping and accounting workflows.
c) Understanding available Xero features.
d) Troubleshooting accounting software issues.
e) Improving financial reporting and record-keeping practices.
You can explore Xero's advisor directory to identify professionals who may be able to assist with your requirements.
13) Protect Financial Records with Lock Dates
Lock dates help protect completed accounting periods by restricting changes to transactions dated within those periods. This feature comes particularly handy when businesses have finalised financial reports, completed reconciliations or prepared information for an audit.
For example, after completing month-end or year-end accounting checks, you can set a lock date to help prevent unintended modifications. To manage lock dates:
a) Open your organisation's settings in Xero.
b) Navigate to the financial settings or relevant lock date controls.
c) Select the appropriate lock date options.
d) Enter the required dates.
e) Save the settings.
Pro Tip
Set lock dates after completing reconciliations and reviewing financial records for the period. This helps reduce unintended changes to historical transactions and supports more consistent financial reporting.
14) Use Built-in Calculations
Xero supports basic calculations in certain amount fields, helping users work out figures without switching to a separate calculator. This can be useful when entering transaction amounts, dividing costs or calculating adjustments.
For example, supported calculation fields may allow arithmetic operations such as:
a) Addition: Combine two or more amounts.
b) Subtraction: Deduct an amount from another.
c) Multiplication: Calculate quantities or repeated amounts.
d) Division: Split an amount into equal parts.
To use a calculation, select a supported numerical field and enter the arithmetic expression using the available operators. These built-in calculations are intended for straightforward arithmetic rather than spreadsheet-style functions such as SUM, AVERAGE or COUNT.
15) Email Supplier Bills Directly to Xero
If suppliers regularly send bills as PDF attachments, Xero offers document submission options that can simplify bill entry. Rather than downloading and manually entering every supplier bill, you can forward supported documents to the dedicated bill submission email address available for your organisation. To use this feature:
a) Open the bills area in Xero.
b) Locate the available email-to-bills submission option.
c) Copy the dedicated email address provided for your organisation.
d) Forward a supported supplier bill to that address.
e) Review the resulting draft bill and verify the extracted information before approval.
Check details such as the supplier, invoice date, amounts, tax treatment and payment information before approving the transaction.
Develop practical accounting software skills that improve accuracy with Accounting Software Training – Join now!
How to Choose the Right Xero Features for Your Business?
Choosing the right Xero features depends on the accounting activities you perform most frequently. Start by identifying the tasks that consume the most time and explore the features designed to simplify them. The following table can help you identify suitable options:
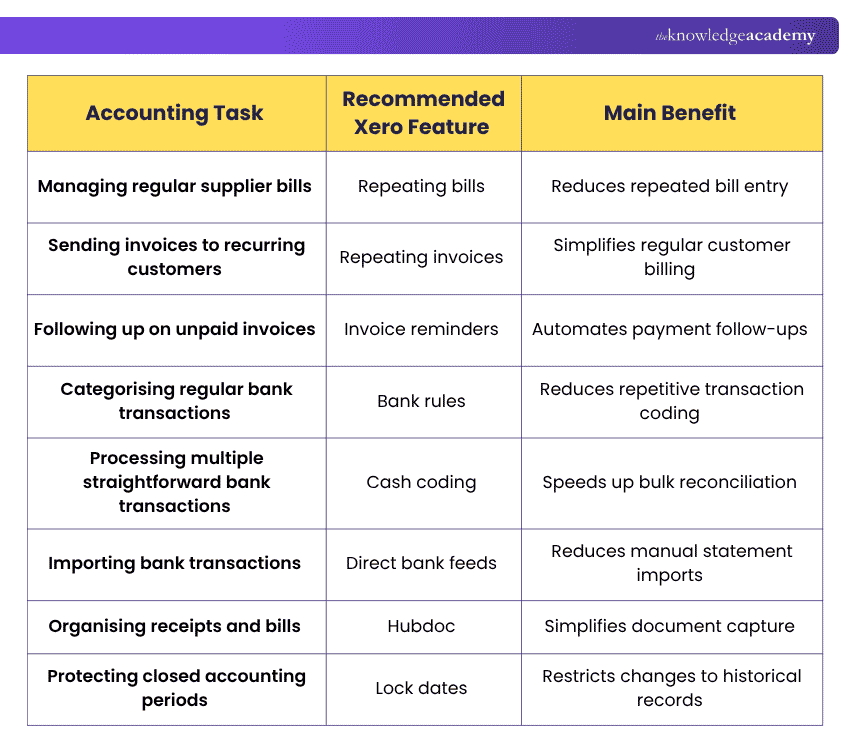
Before enabling a feature, check whether it is available in your Xero subscription and whether your user role provides the necessary permissions. For automated processes, review the resulting transactions regularly to ensure that the information remains accurate.

The Knowledge Academy develops accessible learning content across Project Management, IT, Cybersecurity, Data Science, Business Analysis, HR, Accounting and Finance, Leadership and Health and Safety. Its resources combine subject research with clear explanations to help professionals build practical knowledge across a wide range of disciplines.
View Detail

 If you wish to make any changes to your course, please


