




We may not have the course you’re looking for. If you enquire or give us a call on +31 208081674 and speak to our training experts, we may still be able to help with your training requirements.
How to Crop in Inkscape: From Start to Finish
ByNilotpal SarmahLast updated on: 18 September 2026
Learn the art of precision with this blog. This step-by-step process will help you harness the powerful cropping features of Inkscape, from importing to resizing. Whether selecting vectors or adjusting opacity, this blog will empower you to take your design journey to the next level.
Read This First
1. Inkscape uses clipping to hide parts of an image without permanently deleting them.2. Place the clipping shape above the image to define the area that remains visible.3. Select both the image and the clipping shape before applying the clip.4. Use Object > Clip > Set Clip to apply the clipping effect.5. Release the clip when you need to restore hidden areas or make further adjustments.
In graphic design and illustration, Inkscape stands out as a powerful and versatile tool. One of its essential features is the ability to crop images with precision. In this comprehensive blog, we will walk you through the steps on how to crop in Inkscape, ensuring you grasp the process from start to finish. So, let's dive into the excellent cropping functionality in Inkscape.
Trainer's Insight
Think of the clipping shape as a window. The part of the image inside the shape remains visible, while the content outside it is hidden from view.
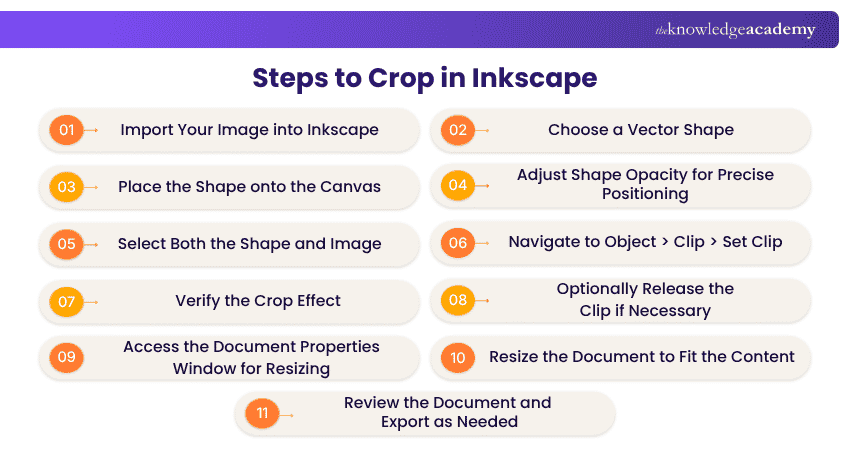
Steps to Crop in Inkscape
These are the comprehensive steps to crop in Inkscape. Let's look at them below:
1) Import Your Image Into Inkscape
Begin by launching Inkscape and importing the image you want to crop. You can do this by picking "File" from the menu, followed by "Import", and then choosing your image file.
2) Choose a Vector Shape
Select a vector shape that suits your design needs to initiate the cropping process. This can be a rectangle, circle, or any other shape available in the Inkscape toolbar.
3) Place the Shape Onto the Canvas
Drag the chosen shape onto the canvas, ensuring it covers the area you wish to keep in the final cropped image. Make sure the shape is positioned above the image, as Inkscape uses the topmost selected object as the clipping path.
4) Adjust Shape Opacity for Precise Positioning
To precisely position the shape over your image, adjust its opacity temporarily. This step helps you align the shape with the desired portion of the image accurately.
Bonus Tip
Lower the shape's opacity while positioning it. This helps you see important details underneath and align the crop more accurately.
5) Select Both the Shape and Image
Click on both the shape and the image while holding down the "Shift" key. This action ensures that both elements are selected simultaneously.
6) Navigate to Object > Clip > Set Clip
With the shape and image selected, go to the "Object" menu, choose "Clip," and then click on "Set Clip." This action applies the cropping effect to your image based on the selected shape. The areas outside the shape are hidden rather than permanently deleted.
Unlock the future of animation with the Animation Course – Sign up today!

7) Verify the Crop Effect
Take a moment to review the results. Your image should now be cropped according to the shape you selected. This step is crucial to ensure that the desired portion is retained, and unwanted elements are removed.
8) Optionally Release the Clip if Necessary
If you need to make further adjustments or release the clip, navigate back to the "Object" menu, select "Clip," and choose "Release Clip."
Pro Tip
If you are new to clipping, practise with rectangles and circles first before experimenting with more complex shapes.
9) Access the Document Properties Window for Resizing
If you also want the page to fit the cropped artwork, access the "Document Properties" window by clicking on "File" and then selecting "Document Properties."
10) Resize the Document to Fit the Content
Adjust the dimensions to fit the cropped content in the "Document Properties" window. This step ensures that your final design maintains the desired proportions.
11) Review the Document and Export as Needed
Before exporting your cropped masterpiece, thoroughly review the document to confirm that everything aligns perfectly. Once satisfied, go to "File," choose "Export," and save your work in the preferred format.
Quick Checklist: Before You Export
□ Import the correct image□ Choose a suitable vector shape□ Position the shape over the area to keep□ Check the crop alignment□ Select both the image and clipping shape□ Apply the clip□ Review the cropped result□ Adjust the document size if required□ Check the final composition□ Export in the required format
Learn more about digital painting with the Digital Painting Course – Sign up today!

Nilotpal Sarmah is a Senior Content Writer with 11+ years of overall experience spanning engineering, operations and content development. His technical knowledge and extensive writing experience enable him to simplify specialised topics across IT and Tech, Business Skills, Project Management, Health and Safety, and ISO and Compliance.
View Detail

 If you wish to make any changes to your course, please


